|
Thu May 15, 2014
18:35
|
|
|
I had purchased a VF Engineering "pendulum" transmission mount from the good people at ECS Tuning a while back,
and I finally felt good enough (after a recent neck injury) to install it. The 3.2 VR6 in the R32 makes a bunch
of torque, so those factory rubber mounts take a real beating. Soft and unpredictable throttle response, lurchy
downshifts, and less-than-crisp upshifts can all result from this. I don't know what the DSG R32s felt like
when they were new, but I know what mine (with 96,000 miles on it) felt like when I got it. I had chalked up
the strange throttle response to it being drive-by-wire, but the lurchy downshifts were especially annoying.
The VF Engineering mount, shown below, uses a polyurethane insert to fill up the voids in the factory rubber
mount on the chassis side, to increase rigidity. I bought the full mount, which includes the aluminum
"pendulum" parts, fitted with polyurethane bushings:

It was a breeze to install - it only took about an hour, and that was with the kids "helping". To install
the poly insert, I greased it up with a little bit of petroleum jelly and tapped it into place with a rubber
mallet. If you're just doing this one mount, supporting the engine isn't necessary (but it can help the bolts
come out a bit easier), this mount only keeps the motor from rocking back and forth on the other remaining
mounts. I needed to use a jack to crowd the engine just a bit to get the holes to line up when installing
the new mount.
The mount made a very noticeable difference. The throttle response is definitely sharper, downshifts are
amazingly good now, and upshifts are a little bit more crisp. I noticed absolutely no difference in
vibrations or harshness coming through the chassis.
|
|
|
|
Mon Jun 23, 2008
18:24
|
|
|
So, nothing terribly exciting lately. The high compression ABA Mk2 has about 600 miles on it since the
engine rebuild/swap, so I'm planning on an oil change tomorrow night. The original radiator was cracking
around one of the upper mounts and seeping coolant, so I replaced that this past weekend. The oil pressure
sensor mounted on the oil filter housing is leaking oil at the electrical connector. I'm also in the process
of finding the best temperature range to use for spark plugs - I have mostly been running a set that are 1
heat range colder than stock. The stock heat range does appear to be a little too warm.
New summer tires came in a while back - a set of Nexen N3000, in 195/45-15. They were crazy cheap, and seem
to grip just fine. I read some reviews which mentioned poor hydroplaning resistance, but it was pouring with
rain today and they seemed to do well. They aren't super quiet, but they're one heck of a lot quieter than
Yokohama A-520s (haha).
|
|
|
|
Mon May 26, 2008
16:38
|
|
|

Can you tell what's different in this picture, other than the front bumper finally being reinstalled?
Last inspection, I was told that I should have side marker lights on my 91 Golf
for the next time. The previous owner had removed them and filled the holes in
the fenders before painting the car. I decided that since anything I did would
require modification to the fenders, I might as well do something cool looking
and unusual. I don't care for the factory A2 side marker lights. I've always
rather liked the A4 style side markers that are also found on some Audis and
Passats - those small, clear, oval ones. So I ordered a pair, along with the
amber colored bulbs, and also scored a pair of the bulb connectors to splice
into my wiring. After that, it was simply a matter of making a template, and
using that template to mark and cut holes in the front fenders - I chose to
locate the new lights in the rear of each fender, just ahead of the front doors
(very similar to their location on the A4s and Audis). With the inner wheel
well linings removed, there was plenty of room to access the lights from the
back. I'm pretty happy with the end result - definitely a huge improvement
over the factory side markers.
Here's one of the 2 spliced adapters to go from the factory wiring harness to the Audi style light:

And here is a closer view of the end result:

|
|
|
|
Sat May 03, 2008
04:25
|
|
|
A quick update: a few nights ago my new alternator arrived and
I installed it. No more charging problems! With everything working
I was finally able to take her out for a spin around the block.
The car had moved under its own power since the engine swap, but
this was the first time I had really driven it. I'm hoping to
get some video footage to post up - watch this space!
|
|
|
|
Sun Apr 27, 2008
14:37
|
|
|
I took a trip to Autozone this weekend, and it turns out that all 3 alternators
are actually bad. Go figure. A new one is on its way. On a related note, I had
tried taking one of the alternators to Pep Boys to have it tested - it took them
10 minutes to discover that they didn't have the right adapter to go from their
machine to the exciter wire terminal. So if you want your A3 alternator tested,
don't waste your time at Pep Boys.
|
|
|
|
Sun Apr 13, 2008
08:01
|
|
|
The major remaining issue with the high compression engine swap is the battery charging
circuit. I've tried 3 different alternators so far, and all produce no output. The
testing procedures in the Bentley manual lead to all 3 alternators being bad... but
I just have a hard time believing that. What I need to do is take the alternators to
an Autozone (free alternator testing!) so that I can be 100% certain. The wiring
is so darn simple with these things, that I'm basically stumped.
On a more positive note, the motor runs great with the Techtonics 268 camshaft
and the ignition timing close to correct. Some of you may be wondering why I chose the
TT 268 over the 270. The 270 has better idle characteristics (close to stock, actually)
and fantastic power gains. The 268 does have a little more lift, but I chose it mostly
for it's large valve overlap period. It is also ground with an offset to favor top-end
power. The larger valve overlap should really favor high compression applications
like mine. Had I kept the factory compression ratio, then I would have chosen the 270.
|
|
|
|
Wed Mar 26, 2008
19:33
|
|
|
So, a little more than a week and a half ago, I started the high compression
ABA engine for the first time. Since I half expected the engine to explode,
I consider this a minor success. Ignition timing issues, alternator issues,
and a clearance problem with the adjustable cam pulley kept me from running
the engine for more than a couple of minutes.
Here are a couple of shots of the new engine, installed, and in a ready-to-run
state:


And here is a close up view of the clearance problem with the Autotech adjustable cam
gear - note the back surface of the gear, where it has "machined" itself against the
edge of the valve cover.

I e-mailed Autotech to see if they had any advice as to whether I should shim the gear,
or clearance the valve cover. I was leaning toward shimming the gear, since the timing
belt was running just a hair over the outside edge of the gear. I never heard back from
Autotech, but in the meantime I ordered a Techtonics 268 camshaft to install at the
same time I addressed the cam gear issue. What I ended up finding was that the Techtonics
camshaft was just a tiny bit longer than the stock camshaft I had been using, and so
the cam gear sat that much further away from the valve cover, which eliminated the
clearance problem. The new cam is now completely installed, and at the same time I
addressed the ignition issue I was having. One of the pins on the ABA distributor body
wasn't completely removed (it was sheared off) and that was limiting the amount of
adjustment I could make to the ignition timing ... I couldn't get it advanced enough
to run right before that pin got in the way.
So, I'm looking forward to starting it up with better ignition timing, and with the more
aggressive camshaft in place.
|
|
|
|
Sun Mar 23, 2008
07:02
|
|
|
I've been meaning to put up a quick post about this for a while now.
I've mentioned it before, but the ABA swap into our Mk2 Golf is using a
complete serpentine belt setup, completely eliminating the original v-belt.
The serpentine setup is far easier when it comes to maintenance, and much
less prone to slipping in wet conditions. For my application, this conversion
was particularly easy, since I'm not using A/C or power steering. This leaves
only the alternator and water pump that need to be driven by the serpentine
belt. The alternator is easy - it can be used exactly as on an A3. The water
pump is a little tricky, because even 4 cylinder A3s have a v-belt to drive the water
pump and power steering pump. I used a fairly common trick, which is to bolt
a VR6 water pump pulley onto my water pump. The VR6 water pumps are driven
from the back side of a serpentine belt, so the pulley is smooth. If you use
this pulley on a 4 cylinder water pump, then you must drive it from the ribbed
side of the serpentine belt - otherwise the water pump will be turning in the
wrong direction. This method works just fine, and you can even get the VR6
pulleys brand new from the dealer as well as most of the online parts stores
(that is, if you can't find one in a junkyard). Next, you'll need to figure
out what length belt to use. For my application, I'm driving the A3 alternator,
water pump with VR6 pulley, and using the non-AC alternator bracket with
automatic spring tensioner. The length of belt I ended up using was 41 inch.
I believe that 40.5 inch might have been a slightly better fit, but 40 inch
was definitely too small. Find a local auto parts store with helpful people
behind the counter, and they'll be happy to help you get your hands on the
different belt sizes.
Here are a couple of pictures showing the new serpentine belt setup. It is
a much cleaner looking configuration than the factory A2 layout.


|
|
|
|
Sat Jan 19, 2008
06:49
|
|
|
Last weekend, the high compression ABA motor became officially installed - the transmission is bolted to it,
and the rear engine mount is connected. With the crankshaft serpentine belt pulley removed from the timing belt
pulley, there was enough room to maneuver the engine so that it would mate up to the transmission. Here she
is, finally home:

While working on the cooling system, I ran into a little bit of a problem. The Mk2 Golf coolant hose which
runs from the front side of the cylinder head down to the water pump did not really fit any more. Two things
that the original engine block did not have were the auto tensioner for the serpentine belt (since it didn't
have a serpentine belt at all) and the assembly for routing crank case vapors. The coolant hose was really
blocked by both of those until I trimmed about a half inch off the end of it. That allowed it fit, albeit
snugly, between the serp tensioner and the lower crank case vent. Most people doing this sort of ABA block
swap would be using a blockoff plate for the crank case vent (like the one Techtonics sells), and that would
save you from this coolant hose problem. Instead of using the blockoff plate, I used the original plastic
vent and simply plugged it using a modified coolant flange plug and o-ring. Here is a picture, showing the
coolant hose wedged snugly between the vent and the serpentine belt tensioner:

|
|
|
|
Tue Dec 18, 2007
19:18
|
|
|
My digital camera stopped working about a month ago, so that has kind of discouraged me from
posting lately. Anyway, here's an update on the high compression ABA engine swap for my Mk2
Golf. The engine is completely assembled, and I opted to use a set of ARP undercut head studs
(they are supposed to be ideal for high compression applications like this) and an Autotech
adjustable cam gear. I removed the old engine, while leaving the transmission in the engine
bay. Once I install the intake manifold, timing belt, and accessory belts, then the motor
can be bolted into place.
Here are some pictures of the new engine, almost ready to go into the engine bay:
|
|
|
|
Thu Aug 09, 2007
18:47
|
|
|
This week I picked up my spare Digifant cylinder head from the machine shop.
This is the cylinder head for my ABA engine swap. I had 50 thousandths of
an inch milled from the gasket surface of the head - when used with the
ABA block, it will give me a compression ratio of 11:1. If this motor
actually holds together, it will be a monster (for an 8 valve, at least).
I'm sure I've mentioned it in one of my very early posts, but the 2.0 ABA
blocks made before the 1996 model year have high quality forged internals
and piston oil squirters. These blocks are perfect for high compression and
forced induction builds. I will start by using the stock camshaft and cam
timing gear, just until the engine gets a few hours on it. With so much
shaved from the head, there will be a 1 degree cam timing error that I really
should compensate for, using an adjustable cam gear. This engine should
also respond pretty well to an aggressive camshaft. I haven't decided which
cam I will use yet. I may try more than one.
Enough yakking. Here are pictures of the head, which has been pressure
tested, milled, and has had the valve seats resurfaced... oh, and check out
my polished combustion chambers:


And here is the head after I spent some time lapping the valves into it:

|
|
|
|
Sun Apr 29, 2007
08:27
|
|
|
Well, the ACN transmission I rebuilt is finally installed in our Mk2 Golf.
While I was removing the old transmission, it fought me every step of the way.
The new transmission went in fairly well, but there were a few hiccoughs along
the way. I guess I'll start at the beginning.
A2 transmission removal is possible without removing the engine, and without
removing the front axles ... but just barely. It is a tight, tight squeeze
and the transmission has to be twisted around into precisely the correct position
before it will drop out from the bottom of the car. First, the starter needs to be
removed (the engine has to be supported first, since the starter bolts are also
the front engine mount bolts - weird, I know), the shift linkage disconnected,
the inner CV joints disconnected, the speedometer cable disconnected, and the clutch
cable disconnected. You can also make the whole unit a couple of pounds lighter
by draining the gear oil first (recommended). I didn't drain the gear oil because
I didn't have room left in any of my oil-draining containers. Next, there are
two 11mm hex bolts that bolt that tin cover plate to the bottom of the transmission
bellhousing. You'll see them at the bottom of the bellhousing, hanging right
below the engine's oil pan on that side. They might be completely invisible
underneath a heavy layer of grime - so grab a brush and start scrubbing if you
can't see them. Other than those, there are only three 19mm bolts left holding
the tranmission to the engine block. Two are near the back-side of the engine -
one up top that goes in from the transmission side, and one down at the bottom
that goes in from the engine side. There is one more on the front-side of
the engine, near the top, that also has a ground strap bolted to it. At
some point you'll want to support the transmission with something (a jack, or
jack stands, or a strong friend).
Next, there are two transmission mounting brackets
(one steel, one aluminum) which both come together to bolt down to a single
transmission mount on the subframe. One bolt holds them down to the mount, and
it's located below the brake master cylinder which makes it kind of tricky to
get to. I used an impact wrench with an impact-grade universal joint and a long
extension (when you use a universal joint with an extension, always try to get
the joint as close to what you're trying to remove as possible - that makes
it a little more stable). The aluminum transmission mount needs to be disconnected
from the transmission. It has some of the shift linkage fixed to it, so you
can either disconnect the linkage from it and remove the aluminum piece altogether,
or you can leave the linkage affixed and just swing the piece up on top of the
transmission (that's what I did, and it didn't seem to be in the way at all).
Anyway, three long bolts hold that aluminum bracket to the differential housing.
I removed two from the top (leaning over the engine bay) and one from underneath
(laying on the ground). You will need to remove the steel mounting bracket
from the transmission also - but it can be tricky. The two bolts holding it in
place go through from the side closest to the body of the car, and even after you
take the nuts off the opposite end, the bolts will not slide out until you let
the transmission drop down so that those bolts can be slid out underneath the driver's
side crumple zone. Then the steel bracket can be removed from the transmission.
Those brackets will both hit the side of the engine bay, preventing you from completely
removing the transmission - so definitely take the time to remove them.
At this point, I had absolutely everything disconnected from the transmission.
There was nothing left holding it in place except for fear and common sense
(as a favorite saying of mine goes). I spent the next 2 hours trying to remove
the transmission from the engine bay. This is where a second person helps -
otherwise it is just a physical wrestling match. The key is to rotate the
gearbox so that the differential is raised up, and then swing the back side
(fifth gear housing side) of the transmission at an angle downard and slightly
toward the front of the car. That sounds easier than it is, trust me. The passenger
side output flange will want to keep catching on the flywheel teeth on the engine,
and the bracket for the front motor mount will want to keep binding against the
transmission housing. Removing that front engine mount completely might make
things easier - and removing the passenger side drive flange from the transmission
would definitely make things easier but could also get pretty messy. I finally
worked the transmission out while supporting it with my knees from under the
car and then let it slide into my lap. The front of the car was jacked up
high enough so that the transmission came out with me as I slid out from underneath
the car. ... and that was Thursday night. I needed a shower and some sleep after
that nonsense.
Friday after work I wrestled the rebuilt transmission into place, which went much
easier than removing the old unit. I had some parts to swap over from the old
transmission onto the new one before installing it, but that didn't take very
long. All in all, it was about 3 hours until the new transmission was physically
bolted into place. I called it a night and cleaned up, counting on getting
all the loose ends tied up in the morning. ... silly human.
Saturday morning I resumed work. Did up the transmission mounts, torqued those
19mm transmission-to-engine bolts, installed the starter (and front engine mount
bolts), attached the shift linkage, and attached the
clutch cable. Before filling the transmission with oil, I wanted to make sure
the clutch felt like it was engaging and disengaging properly. Everything
felt good, so I added 2 quarts of Redline MT90 through the speedometer cable
hole (way easier than using the fill hole on the side of the transmission) and
then attached the speedometer cable. I then turned my attention to reconnecting
the inner CV joints to the differential output flanges. It was about this time
that I realized something major that I had overlooked. The flanges I reused on
the transmission I rebuilt were the wrong size!!! This transmission came out of
an early A2, and used 90mm flanges. My A2, being a 1991, uses the larger
inner CV joints which need 100mm output flanges. I now faced having to swap out
the flanges with the transmission in the car, and filled with brand-new Redline
oil. Crapola. So I bit the bullet and removed the driver side axle completely
(it was the only way to get enough room to operate on that flange), took the 100mm
flange off the old transmission, cleaned it up, then removed the small flange
from the transmission in the car... then I scrambled to install the larger
flange while transmission fluid was peeing out. I didn't want to lose any
more than I had to. That stuff is about $10 a quart (if you find a decent
deal on it). The other side was a little easier because I could just prop the
axle up out of the way rather than completely remove it. In the end I only lost
a few ounces of fluid. That whole operation ate up quite a bit of time, though.
Now I had correct flanges that would mate up to the inner CV joints. I made sure
the transmission was in neutral so that I could rotate the flanges while
installing the inner CV joint bolts... but there was a problem. Even with the
gearbox in neutral, I could not get the output flanges to turn. Before installing
the larger flanges, they turned with little effort. All kinds of terrible thoughts
started to go through my head - had something in the transmission popped loose and
allowed a gear to engage? Had something in the process of installing the larger
flanges caused the differential to bind up? In desperation, I pushed down the
clutch pedal and ran the shift lever through the gears and everything felt fine.
Now everything was mysteriously freed up. Strange. That made me a little
nervous, but everything seemed okay so I continued bolting the inner CV joints
to the transmission drive flanges. With that done, I started the engine with
the front end in the air just to make sure the clutch engaged and disengaged
correctly, and to make sure the tranmsission would actually drive the wheel
hubs when it was in gear. Everything was fine - clutch acted correctly, and
my front brakes started spinning up like crazy as I ran through some of the
gears. Cool. I took this opportunity to install my summer wheels and tires too,
since nice weather is finally here.
So now everything was back together and the car was back on the ground. Ready
for a test drive. One thing that I don't believe I've mentioned yet is that
I rebuilt this transmission using a Peloquin 80% limited slip kit. It takes
the factory 20% limited slip and anti-torque-steer effect and increases it
to 80%. So in theory, it should now take nearly 100 ft lbs of torque for a wheel
to start spinning instead of the factory 25 or so. Anyway, test drive time -
and everything was good. Better than good, actually. The transmission is nice
and quiet (especially compared to my old one, which had some nasty bearing
noise), all the gears engage very nicely, and I'm not leaking transmission oil
from my drive flange seals anymore. That whole thing was a real fight, but
definitely worth it. I need to do an alignment now, though. The alignment was
a little bit out to begin with, and now it's even worse because I had to disconnect
the driver's side ball joint to remove the axle on that side. I may do a writeup
on how to do your own alignment soon. Watch this space.
|
|
|
|
Tue Apr 24, 2007
14:10
|
|
|
As I mentioned in my last post,
I have been rebuilding an ACN code 020 transmission to swap into our Mk2 Golf.
I did not document tearing down this transmission, because my last post documented tearing down an A3
transmission and the procedure is practically identical. Once the unit was disassembled, I was
pleasantly surprised to see that all of the synchros were good, all of the bearings were good, and
there was no damage to any of the gears. The parts for the rebuild consisted almost entirely of
seals and gaskets. Even the large pinion shaft bearing was nice and smooth, with no play whatsoever -
and that is pretty unusual. I think this unit may have been rebuilt in the past, because I'm certain
that it did not come out of a low mileage car (none of our parts cars were low mileage).
Most of the time I put into this unit was in sand blasting (technically, glass bead blasting) the
aluminum case pieces. They came out pretty nice, as you can see here:

The first picture below shows the differential and pinion shaft installed in the case. The second
picture shows the input shaft installed. The third picture shows the 1st through 4th shift forks
installed:


Assembling the two case halves can be tricky if you are not replacing the large input shaft bearing. The
official procedure is to press the bearing into the upper (or rear) case half, and then install the case
halves so that the input shaft presses into the bearing. If you want to reuse your existing bearing then
you would have to pull it off without damaging it first, and that can be tricky. I wanted to reuse the
bearing without pulling it off first, so I tried a trick using the bearing plate to help press the bearing
into the upper case half while assembling the two halves. In the first picture below, you can see the
case halves partially together, which I accomplished by heating up the upper housing with a torch, then
tapping it down onto the bearing (don't pound hard, it could damage the bearing!). I had made sure to
roughly line up the bearing plate before installing the second case half, so that I could then use some
very long metric bolts of the appropriate size and thread to draw the bearing plate up close enough to
be able to install the correct screws (those four inset triple-square screws), which you can see in the
second picture below. That method worked pretty well. The third picture below shows the case halves
assembled and the driven 5th gear in place on the pinion shaft.


Unfortunately, I didn't take a picture of the drive 5th gear (on the input shaft) being installed, but
it really is just the opposite of taking it off. Press it into place (may need some gentle tapping with
a rubber mallet) and get the shift fork back into place so that you can engage both 5th gear and reverse
gear at the same time. You will need to manually move the shift forks to do that, which means you
can't have the selector shaft installed just yet. The first picture below shows the shift forks
through the reverse light switch hole in the selector shaft housing (later transmissions don't have
this hole, FYI) - the fork on each end needs to be pressed down. This will allow you to correctly
torque the hollow input shaft bolt on the end of the drive 5th gear. You may need a friend to help.

Now the selector shaft can be installed. The first picture below shows the selector shaft installed,
with a new seal in place. The second picture shows the installation of the selector shaft cover.
Don't forget that big spring that goes in there. The tool I'm using here is just a bolt with a 27mm
hex head with a couple of nuts jammed against each other. Jamming the nuts probably wouldn't be quite
good enough for removing this plate - welding them onto the bolt would be the way to go. This tool
can also be used for the timing plug in the top of the bell housing.


Now you can adjust the 5th gear shift forks. The first picture below shows me measuring between the
top of the threaded rod and the shift fork. That measurement should be 5mm (or 0.2 inches). In this
picture, I still have some adjusting to do - I am measuring about 0.1 inches.

In the picture below, you can see the 5th gear housing installed. Don't forget to install your throwout
bearing.

Now is also a good time to replace the clutch rod bushing and clutch rod oil seal (actually, the best
time would be just before you install the 5th gear housing). The bushing is very
important - a worn bushing will cause a new seal to start leaking pretty quickly. My bushing was
totally shot. It was worn to the same inside diameter as the rest of the input shaft pushrod bore.
When they get that worn, you cannot push them out from the back like the book recommends without doing
something to plug up that hole first. The easiest way is to get a thread tap that will fit the worn
ID of the bushing and cut threads so you can install a bolt to plug the hole. You can now either
rig up something as a slide-hammer against the bolt you put in, or just whack it out from the back
like the book says to. In the first picture below, you can see the trashed bushing I removed along with the tap I used to
cut the threads. The second picture shows the new bushing about to be installed. Drive it back until
it seats against the smaller inside diamater of the input shaft. The oil seal gets installed in front
of the bushing, sitting back roughly 0.5mm from the end of the shaft.


And here is the end result. I didn't cover the installation of the drive flanges, mainly because I didn't
take pictures of that... but it really is straightforward. If you removed them, you know how to install
them. I installed a Peloquin 80% limited slip upgrade while I was installing these flanges, which
included new flange seals, inner flange caps, brass rings, and good instructions. Well worth the price
at just under $100 (for a kit that does both sides). The stock limited slip is 20%, so it will be
interesting to see what kind of difference I notice.

|
|
|
|
Sat Mar 17, 2007
11:31
|
|
|
We have decided to take in a 96 Subaru Outback that a coworker of mine just
wanted to get rid of. It needs plenty of work, but is basically a good running,
good driving, and good looking vehicle. We needed a station wagon anyway.
It has 201,000 miles and still runs great (a good sign that the engine was
taken care of), but needs some exhaust work (it has a large leak near the
rear muffler), and possibly brake and suspension work. The check engine light
is on, so I'll need to investigate that too. The tires probably won't pass
inspection either. Yeah, that's a lot of stuff - but for 100 bones, it's
still a smoking deal. I never would have guessed that I'd find a car for that
cheap that I could actually drive home.


|
|
|
|
Sat Mar 17, 2007
11:09
|
|
|
A fellow Vortexer was parting out a 1998 VR6 GTI, so I made a deal to buy the
front and rear black leather seats along with the smoked rear tail lights.
Claire and I swapped out the seats this afternoon, and then Claire swapped
the tail lights. All we need now is a set of black leather door panels that
will fit. I did get the GTI door panels thrown in with the seats, but GTIs
are 2 doors and our Golf is a 4 door.
Here is Virginia with the smoked tail lights:

And here is the interior with the new seats installed:


|
|
|
|
Sun Feb 04, 2007
16:51
|
|
|
Last summer I
replaced the main bearings in our 1996 Golf (her name is Virginia), and I really should have done the
rod bearings at the same time. I just got back from my trip to Australia last week,
and was welcomed with single digit temperatures. In that kind of cold, I noticed
Virginia was awfully noisy until the engine warmed up, and it sounded like it could possibly
be rod knock. The rod bearings are pretty easy to replace, so I decided to do it - plus, I
already had the new bearings sitting around somewhere.
The job went real smooth, and even though the old bearings weren't worn quite as much as I
expected, they were still pretty trashed. Lots of pitting and scoring in all of them. The
upper halves of the bearing shells showed far more wear than the lower halves.
Here are some pics (click them for larger views):


And here is a picture of the tiny bits of plastic I found in the bottom of the oil pan. I found these
last time, too. The black pieces are hardened gasket maker material, and I think that the reddish brown
pieces are from a broken dipstick tube (you VW owners out there know how often those things break).
There's nothing else I can think of made of that color plastic that could get into the oil. (click
for a larger view)

|
|
|
|
Sat Jan 06, 2007
17:39
|
|
|
Tue Dec 05, 2006
07:59
|
|
|
After I got home from work last night, I pulled the 91 Golf into the garage
and started to attack the exhaust system. The old system was a pain to remove
because it was all welded together. With the old system out, I took a look
at the innards of the catalytic converter and I was surprised to see that it
looked excellent. The previous owner must have installed that cat not long
before I bought the car (it is supposedly a Techtonics high flow cat, but I
haven't verified that yet).
Installation of the new system was problematic at times, but I worked through it.
The diameter of the pipes was so large that everything just barely fit. This
system is supposed to be the same diameter as the stock PF engine'd 8 valve
GTIs. I had no idea any of the factory systems were that beefy. Since I was
installing an exhaust that technically was made to fit a different car (mine is
a Golf GL, RV engine code), I wasn't surprised that I ran into little problems.
The forward-most hanger had to be removed from the body of the car and then rotated
almost 180 degrees. The over axle pipe just barely missed the brake
balance controller (there's about 1/8th inch of clearance). The intermediate
pipe rests firmly on the rear subframe, and there is absolutely no adjustment
in the system to raise it. It's so close to everything everywhere that once
everything physically fit, there was no adjustment for anything. My rear-most
hanger was missing (since the last system didn't use it), so I had to make a
hanger to mount to the stud coming out of the body. The other issue I ran into
was with some of the hardware that Bosal provided with the system. I nearly
stripped out 2 of those nice copper nuts because they got cross threaded... and
I was trying to be incredibly careful for that very reason. I had to chase the
threads out with a tap in order to use those nuts, but that destroyed the nuts'
self locking ability. Bummer.
With everything installed, I started the engine to make sure there were no leaks
and to see how bad the rattles would be. Amazingly, the system does not rattle
at all. Some vibrations come through the body because one of the pipes is resting
on the rear subframe, though. I will insulate that with some rubber, I think.
The system is quieter than I expected, but the rear muffler appears to be glass
packed which means the sound will change as it gets broken in.
|
|
|
|
Mon Dec 04, 2006
12:47
|
|
|
Last Thursday I finally got pulled over for the exhaust on the 91 Golf.
I was only pulled over for a couple of minutes, and I didn't even get a
written warning so it may have just been a "drunk check", so to speak.
Anyhow, that got me thinking that I should start looking at new cat-back
systems for it. I've been real lucky not to have been pulled over at
all until now.
First off, I figured I should get a new catalytic converter at the same
time. The Golf used to burn a lot of oil (before I replaced the valve
stem seals) so the cat may have some clogging. In addition to that,
the previous owner had the mid-pipe welded to the catalytic converter.
Between those 2 things, I can't count 100% on being able to reuse the
existing cat. To top it off, I thought it would be nice to upgrade to
a 55mm cat, which was the largest that they used on any A2 Golf/Jetta
from the factory. I found a new OEM (Emico) cat at autohausaz.com for just over $150,
which is a pretty good deal. The 55mm cats were used on, among others,
the later 8 valve GTIs with the PF engine - so I kept that in mind while
looking for parts (mine is a Golf GL with the RV engine, at the moment).
Even though I wanted a stainless cat-back system, I didn't want to spend
the money for one (for the most part, they were $500 and up). I saw
that the Bosal stainless sport systems were not necessarily made entirely
of stainless steel (their description says all mufflers and "select systems",
whatever that means, are stainless), and I didn't want to spend almost $400
for a system that might end up being partly aluminized instead of
stainless. I did some more price checking online, and even priced out
a completely factory system (Ansa/Bosal) - which was looking like the
least amount of money. A factory system would have been a little too tame
for my taste, but I was considering it.
The next day I headed to
Atlantic to see what they could do for me, since I know they're good
about trying to match online prices. I won't disclose what I ended up
getting for a deal, but I was pleasantly surprised. They said they were
pretty certain that the Bosal sport stainless systems for the A2s were
made entirely of stainless, and then they quoted me a fantastic price
for one of the systems. To make a long story short (too late?) I ended
up with the cat and a stainless cat-back system for only a little more than
I would have paid online for a cat plus a nice aluminized system.
I went to pick up the system today, and was thrilled to see that it was not
only made entirely of stainless, but it was also completely polished and
used flanged connections! In this picture, you can see the whole system
laid out, along with the new 55mm cat:

|
|
|
|
Wed Nov 15, 2006
18:53
|
|
|
Older VWs like to keep you busy, and my Digifant Golf has been no
exception lately. I posted some time ago about replacing the knock
sensor, and she just ran fantastic after that... for about a week.
The next gremlin was a cold starting issue that got so bad I nearly
gave up on getting the car started after work one day. The car
would run fine after warming up, but would run rough for the first
minute or so after a cold start (if it even started, that is).
In the process of troubleshooting, I tested the fuel pressure by
hooking up a fuel pressure guage to the fitting on the end of the
factory fuel rail. The pressure was 44 psi - quite a bit higher
than it should have been, which indicates a bad fuel pressure regulator.
I replaced the fuel pressure regulator (pretty easy chore, it's
quite accessible), but it was not related to my cold starting issue.
I eventually had it narrowed down to either the coolant temperature
sensor or the ECU itself. The ECU uses the signal from the coolant
temperature sensor to determine how far to advance the ignition timing
under certain conditions, so it's pretty critical that the sensor
operates correctly. I really didn't suspect the coolant temperature
sensor because I had replaced it a couple summers ago, but when
I tested it I found the signal was way out of whack when the coolant
temperature was cold. As the coolant warmed up, the signal from the
sensor quickly pulled back into it's correct range. The sensor is
an easy and inexpensive fix, so I was happy. With the sensor
replaced, my cold start issues were gone and the Golf ran real nice
immediately after cold starts - no more rough running.
With the Golf really straightened out, I thought it would be a good
time to install a Digifast 2 performance chip from vw_pilot (if
you're on the vortex, look him up if you need a digifant 2 chip).
It was $42 including shipping; however, I never received it. After about
a month it was looking like the post office had just lost it or
something. The seller was great about it, though - he sent out
another one, at no charge, via usps priority mail so we could track
it. The chip arrived this evening, so I installed it and took the
Golf for a quick test drive. I am definitely happy with it. There's
some extra pull at low RPMs under heavy load. I didn't really wind
it out, so I have no idea how it affected the top end under full
throttle yet. My favorite thing about it, though, is the fuel
cutoff when the throttle closes. The fuel shuts off completely when
you let off the throttle, until the RPMs reach idle speed. That
may not sound like anything, but it's a huge difference in "fun
factor" as it really increases the engine braking. The Digifant II
cars are fairly high compression (high enough so that they use a knock
sensing system), so there's some pretty decent engine braking when
the fuel is cut off. Not only that, the RPMs drop quicker between
shifts, which means you can shift that much quicker without trashing
your syncros. In fact, the RPMs drop so quick that most of the time
I end up double clutching when up-shifting in order to bring the
RPMs back up to where they should be for the next gear.
Here are pics of the new chip - one before installation, and one
after installation (click for larger view):


|
|
|
|
Sun Oct 08, 2006
18:09
|
|
|
It's now been a few days since the FK 60/40 springs have replaced my old, trashed
Tokico springs and I'm still very happy with them. Even though the front springs
are lower and the rear springs are the same height, the FKs provide a better ride
while still keeping my tires from rubbing against the fenders (with the Tokicos,
I had to be very very careful - even small bumps would cause the rear tires to
rub). Fortunately, the Tokico dampeners are much better quality than the Tokico
springs, and they work well with the FKs. The front dampeners should be changed,
though, because the Tokicos have too much travel (which means the springs are
loose, just flopping around, when the vehicle is raised off the ground). A set
of Bilsteins in the front would be really nice, but they're pricey.
My Golf, with Tokico HP shocks and FK 60/40 springs:

|
|
|
|
Wed Oct 04, 2006
17:22
|
|
|
*sigh* Is anyone out there thinking about purchasing Tokico springs for their
Volkswagen? If so, then take my advice and don't spend money on them. A year
ago I installed a Tokico HP kit, which consisted of dampeners (struts) and
springs. I was pretty happy with them at first, but that didn't last very long.
It was only a matter of months before the handling started to get worse, and
the front end started making all kinds of horrible sounding groans and clunks.
Some time ago, I got under the car to find out what was going on, and there was
nothing obviously wrong - everything felt real tight. I did notice, though,
that the springs were looking incredibly poor. Yes, in almost exactly one year
the Tokico HP springs had degraded to the point that I could only describe them
as "beat". I saved about $100 over the cost of a quality suspension setup from
H&R, and about $300 over the cost of Bilstein struts with Neuspeed springs...
and now I wish I had spent the extra money because the Tokicos are complete junk.
The dampeners are still working fine, thankfully.
What I decided to do this evening was remove the Tokico springs and replace them
with a set of FK 60/40 springs that I had hanging around. FKs are some of
the best springs out there, but FK products can be a little bit difficult to
get in the U.S. I scored a set a couple years ago, though - behold: (click
image for larger view)

I only had enough time to do the 2 front springs tonight, I will do the rears
later. The front FK springs are 60mm lower than stock, which is even lower than
the Tokicos I had been using. Both the Tokicos and FKs are so short that I
didn't have to use spring compressors to disassemble and reassemble the struts.
Here are a couple of pictures of the Tokico springs that I removed (click them
for larger versions):


I took the Golf for a quick spin, and the difference is amazing. Even though the
FK springs are shorter and stiffer, the ride quality is much, much better and there
are no more funny groans and clunks when I go over bumps or cut the steering
wheel at low speeds.
If you're going to spend your hard-earned money, spend it on quality.
|
|
|
|
Tue Sep 26, 2006
18:27
|
|
|
My 91 Golf is well on it's way to running really nice (new oxygen sensor, and new knock sensor on the way).
While I was searching for Digifant II troubleshooting info (even though I have the Bentley book, I still
like to search the web), I found a guy who sells reprogrammed Digifant II chips. There are a few choices
out there when it comes to Digifant II chip upgrades, but some of them ignore knock sensor input, which
requires you to run high octane fuel all the time. One of the most well known upgrades is the Autotech
chip, which also comes with an aluminum bushing to mount between the knock sensor and the engine block -
that basically dampens the feedback through the knock sensor, which I'm not crazy about. To me,
if the knock sensor and ECU are working correctly, and if the engine itself is in decent mechanical
shape, then there's no reason to alter the factory knock sensor setup. I'd rather keep that functionality
100% intact if possible. This other chip I just found out about not only preserves the knock sensing
system, but actually samples input from the knock sensor (as well as several other sensors) more
frequently than the stock program. The chip gets great feedback from other folks who have used them
(there is an entire thread on VWVortex dedicated to praise of this chip upgrade), and seems to be more
of a driveability upgrade than a performance upgrade. Well, the chip upgrade is only $42 including
shipping, so I went ahead and ordered one. I will put up a post once I receive it and install it. These
chips only work with certain Digifant II ECUs - luckily, I have a KEN box which is original (as opposed
to the later boxes issued around 1996 which supercede the original ones). Siemens, Triumph-Adler, and
Bosch also made original Digifant II units.
|
|
|
|
Thu Aug 17, 2006
17:40
|
|
|
So, part of the reason I haven't posted since our trip to Great Britain is that
I've been having exhaust issues on my 91 Golf. The system, as you may know,
is a Brospeed (Bosal) header
into a
Techtonics high flow catalytic converter and then straight pipe to a single
Flowmaster Delta Flow
muffler. Let's just say it has plenty of "character" (that means it's loud). Ever since I finished the
shift linkage rebuild, there has been a little bit of a leak between the header and
the catalytic converter. It wasn't much of a leak, but just enough so that I noticed
it. The part that was sealing that join was nothing more than a strip of stainless steel
mesh wrapped around on itself to form a ring. A couple weeks ago I decided to drop
the exhaust again and get that sealing ring seated a little better. To make a long story
short, I disassembled and reassembled the exhaust 5 or 6 times over the next couple weeks
and only managed to make the leak even worse. Along the way, I tried several different
parts to replace the strip of mesh that was on it. I tried a ring from a Jeep Cherokee
downpipe, but that was too small. I tried two different factory VW exhaust rings, and
both of those were too big (in fact, they appeared to be identical even though they were
different part numbers). Finally, I got in touch with the good people at
Bosal North America and they sent
out the correct part to fit their header. I figured that was the best way to get something
that was going to fit correctly. Even if I had managed to find a universal part with the
correct inner and outer diameters, I really wasn't sure how deep (thick) the ring needed
to be in order to seal properly. Well, the part from Bosal arrived today and I just finished
installing it this evening. No more exhaust leak!
I'm now surfing the web, looking for good prices on cat back exhaust systems. My cat-back system
is just too loud for this quiet little neighborhood we moved into, and it's getting kind of
tender anyway. I can get an entire Ansa cat-back system, but it's a factory replacement system
and isn't likely to have much of a sound at all. Our 95 Jetta has the Ansa factory replacement
cat-back system, and it sounds great for a stock system but it's just far too civilized for an
A2 GTI clone like mine. I need something with a little bit of a bark. I would be thrilled to
find something that sounds as nice as the stainless Neuspeed exhaust on Claire's 96 Golf, but
I doubt that's going to be the case with the cheaper systems that I'm looking at.
|
|
|
|
Sat Apr 15, 2006
20:19
|
|
|
Last season I ordered a
MissingLinkZ solid shift kit
(an all metal shift linkage with spherical rod ends) along with MissingLinkZ teflon bushings for the relay shaft,
UHMW poly selector "ball" and teflon poly bushing for the main shift rod. I also ordered a factory "rebuild kit"
for the lower end of the shift lever. Soon after receiving the parts (which turned
out to be pretty nice quality), I installed everything except for the bushing for the main shift rod (the rod
that goes from the gear shift lever up into the engine bay) and the shift lever rebuild kit. To install those
parts on my A2 requires the exhaust system to be disconnected and dropped, the exhaust heat shield to be removed,
and the shifter box/lever/rod (the whole linkage from the passenger compartment to the engine compartment) to be
removed. I wanted to wait until I had a replacement part for my reverse gear lock-out so that I could do that at
the same time. It's a plastic piece pop-riveted the shifter "box" that is much easier to drill out and remove
with the box removed from the car.
So this weekend I decided it was finally time to replace that bushing, install the shift lever rebuild kit, and
fix my reverse gear lock-out. I worked at a pretty leisurely pace all day Friday (had the day off from work)
and then finished bolting the exhaust back up this morning (Saturday, that is).
Here is a shot of the engine bay, in which you can see some of the MissingLinkZ kit - especially that nice billet
weighted shift rod painted with silver Hammerite. The kit is
great, and made a huge difference in the feel of the shift linkage - no more A2 slop! This kit is nice because
it eliminates rubber bushings in the factory linkage by using all metal spherical rod ends instead.

Here is a shot of the exhaust disconnected between the catalytic converter and header, and the heat shield
removed. To get my exhaust to drop down far enough, I had to disconnect all the hangers. Even then, the heat
shield was tricky to get out without damaging it

With the heat shield removed, you can see the bottom of the shift box and the main shift rod coming out of it:

Four bolts hold the shift box to the body of the car - when you remove them, the whole box will drop down:

At the other end of the main shift rod, just going up into the engine compartment, there is a clamp arrangement
that provides adjustment and fixes the main shift rod to the rest of the shift linkage. In all factory A2 Golf/Jetta shift
linkages (except for 1992 and some 1991 - they have additional adjustment) this is the only point of adjustment - you can adjust both side-to-side
and front-to-back throw of the shift lever. Here is a shot showing the clamp arrangement and the single bolt that
hold it in place. Remove the bolt completely and the sleeve clamp will slide off the end.

With the shift box disconnected and the main shift rod unclamped, the struggle to remove the whole assembly can begin.
Most of the work is trying to squeeze the shift box down past the exhaust. Don't forget that the shift lever is still
sticking way up out of the top of it, so that really makes it awkward to remove. If you can work your exhaust all the
way to the side, then it won't be as bad. My exhaust, however, barely moved aside enough to get the box dropped
down.
With that whole mess of shift box, main shift rod, and gearshift lever removed from the car, my next job was to
remove the gearshift lever from that whole assembly. There are two small nuts holding the shifter base to the
shift box and once those are removed the whole shift lever can be worked free. Kind of tricky because you have to sort of muscle it out
while sliding the main shift rod back at as extreme an angle as possible. It's hard to describe, but pretty obvious
once you have everything out where you can see it. Carry on sliding the shift rod back to remove it from the shift
box. I removed it completely so I could clean up the box and the bushing mounted in it. You'll want to replace that
if if it's worn, brittle, or broken. Here is my shift box with the shift lever and main shift rod removed:

In the picture above you can see the white piece of plastic pop-riveted to the shift box - that's my old, broken
reverse lock-out. You can just barely see part of the shifter base in the bottom of the box - it's a plastic and
rubber piece that simply presses into the bottom of the box and acts as a seat for the mating part of the shifter
base (a plastic ball on the bottom of the lever). My rebuild kit for the shifter base included this piece, so I
removed the old piece just by working it out from the bottom. The new piece slid in from the top quite easily.
And here is my shift lever with the replacement shifter base ball installed - the ball is the mating part for that
piece pressed into the bottom of the box that I mentioned above. The ball is spring loaded so to remove it you
have to keep it pressed "upward" (toward the top of the lever) and drive the roll pin out of the bottom of the lever
and then the ball will slide right off the end.

Here is a side-by-side comparison of my old, broken reverse lock-out piece and the replacement piece that I found
from another car. You can see that the piece on the left is complete and has a tab to keep the shift lever from
engaging reverse unless the lever is pressed down. The piece on the right, obviously, has had the tab broken off.
This is common for older VWs and will make it difficult to get into first gear and possibly even cause you to
shift into reverse without realizing it. To remove the old piece, just drill the heads off the rivets (the rivets
in mine were copper).

You can pop-rivet the new piece back into place like I did, or you can use short bolts and
nuts. If you use bolts, install them so the heads of the bolts are on the inside of the shift box and you
may even have to grind the heads down so they don't stick out as far. Otherwise they may interfere with the shift
lever's movement. I prefer rivets for this because the head ends up nice and flush rather than sticking out.
Here is my shift box with the replacement piece riveted into place:

The last part of my chore was to remove the bracket for the relay shaft which mounts to the top of the steering rack.
The main shift rod passes through a bushing in this bracket, and it's that bushing I needed to replace with the new
teflon part. There are three bolts that hold this bracket to the steering rack. The two in the back you'll have to get
from under the car, and having the exhaust system and main shift rod out of the way first really helps get to them.
The third bolt is trickier (in fact, it's even tricky to locate at first) and I could only get to it by leaning over
the engine bay and reaching down to it with a long extension on my ratchet. The bushing is held in place by a metal
shell pop-riveted over it and if you were replacing it with a factory-like rubber bushing then you could just slide
the old one out and slide the new one in. My replacement teflon bushing, though, was rock solid so it could not
squeeze into place like that. These MissingLinkZ shift rod bearings come with two short bolts and nylon-insert nuts
because of this. I had to drill out the rivets, swap the bushings, then use those bolts and nuts in place of the pop
rivets. I could have pop-riveted it back together, but the bushing came with those nuts and bolts so I decided to
put them to use. Here is a picture of the relay shaft bracket with the new teflon bushing sitting loosely in place.
Next to the bracket is the metal shell that holds the bushing in place:

From there on, it was a matter of putting everything back together. Reinstalling the relay shaft bracket, installing the
shift lever and main shift rod back into the shift box, then working the shift box back into place while routing the
main shift rod back through the relay shaft bracket, and then reinstalling the heat shield and putting the exhaust
back into place. The shift lever base rebuild kit and teflon main shift rod bearing made quite a difference in the
feel. Gear selection is firm, positive, and smooth. As close to perfect as you'll ever get in an A2, methinks. And having
a working reverse lock-out is just great - that alone is worth all the work involved.
|
|
|
|
Sun Mar 12, 2006
22:02
|
|
|
Last weekend we took a trip to visit friends in Keene, which involved driving down
a particular stretch of Route 101 with a speed limit of 65mph. Traffic flow along
that section of road is pretty much 80mph. We were in our 1996 Golf, which currently
has a very short 5th gear installed - so 80mph is well over 4000rpm. After about
20 minutes of cruising with the engine at higher rpms, I noticed that the oil
pressure light started to come on every time we had to come to a stop and let the
engine idle. I had noticed for a while that the engine was starting to develop a
pretty nasty sounding knock (not like a knock caused by cheap gas or incorrect
ignition timing) and it seemed to be getting slowly worse. During this trip, it
was bad enough so that the motor pretty much sounded like a diesel at higher
rpms under light to medium load. Needless to say, I took it pretty easy on the poor
thing after that.
Now, poor oil pressure only at idle is often a sign that the main bearings are
getting worn beyond their allowable tolerances (or that they are badly scored). A worn or malfunctioning oil
pump is also a likely candidate. Our 96 Golf only has 125,000 miles on it, so
I was surprised to see this happening at all. The 96 and later ABA engines, though,
use lesser quality internals - so I wasn't going to rule out main bearing wear
without doing some checking. I talked briefly to Klaus and Wolfgang over at Atlantic
Imported Auto Supply about this, and they informed me of a fairly common problem
on these ABA engines. Apparently, the plastic oil baffle surrounding the pickup
tube for the oil pump is notorious for cracking and breaking, which can cause
small bits of that hard plastic to clog the screen at the end of the pickup
tube. They suggested that I pay close attention to that.
If my only symptom were the oil pressure (without the knocking and rapping), then
I would have assumed an oil pump problem... but the noise really made worry that
the main bearings were in tough shape. The only way to really tell is to tear into
the bottom of the engine block and investigate. My dad was in town, visiting for the
weekend, so we both spent Saturday doing a little bit of open-heart surgery on that
ABA motor in the 96 Golf.
The oil pump, main bearings, and lower rod bearings can all be accessed by removing
the oil pan. On these engines, the oil pan is quite easy to remove because there
are no exhaust pieces or subframes in the way. Behold:

You'll definitely want to drain the oil first:

All of the bolts holding the oil pan into place are easy to get to, except for the
two closest the transmission - those 2 can only be accessed by removing that small
aluminum plate covering the very bottom of the bell housing. That plate is very easy
to remove and once it's out of the way you get to those 2 tricky bolts by using a
"wobble" extension (a socket extension with the end formed so that the socket will
wobble just a few degrees in any direction). On the ABA engines (and some others)
you can use either a socket or a torx bit to remove the bolts. They use nice bolts
that are 6 point on the outside, and torx (star) on the inside. So no need to panic
if some of them are stripped out! Oil pan bolts being removed:

Here is a closeup of the head of one of the oil pan bolts:

Even after all the bolts are removed, oil pans can be a pain to break loose. The gasket
material often causes it to stick, but enough persistence will get it done. The oil pump
will be in plain sight, staring you in the face once the oil pan is removed. The two larger
bolts going up through the bottom of the pump body are the ones that fasten it to the engine
block - remove those, and it will slide right out. Do not try to remove that plastic
baffle around the pickup tube unless you absolutely have to. It's quite difficult to remove
without cracking the clips that hold it in place. Here is a view of the bottom of the oil
pump and pickup tube/baffle.

And here is a view of the top of the pump, showing the input shaft and the teeth of the pump
gears (which actually pump the oil):

If you look closely at the picture showing the pickup tube, you can see a couple of dark flecks
caught in the screen. We also found pieces of old gasket material in the oil pan. If enough of
that junk got sucked up against the pickup tube screen, that could really inhibit oil flow and
cause poor pressure... however, I couldn't really see that being the problem in this particular
case (where oil pressure rises again as the engine rpms are raised slightly). It seems like
a blockage against the screen would keep restricting oil flow through all engine speeds, until
the blockage had a chance to fall back away from the screen. Here is the inside of the oil pan
with a little bit of oil pooled inside - even though there is a lot of junk floating around in
it, you really can't see it in the picture:

The plastic pickup tube baffle showed no signs of being cracked or broken, and we could find
no trace of that hard, black plastic in the oil. Since the oil pump was out anyway, I decided
to check it out using the procedure from the Bentley book ( the VW shop manual),
which involves measuring the backlash and the lateral play of the pump gears. It all checked
out - the pump had minimal (if any) wear. At this point, I was excited to measure the main
bearing tolerances. The main bearing caps can be seen clearly with the oil pan and oil pump
removed, as seen here:

The bearing shells farthest away from the oil pump will normally exhibit the most wear, so
we started by measuring the clearance of the #2 bearing (#1 bearing cap is a little more
difficult to remove - more on that in a moment). Plastigage is used to measure the bearing
clearance - it's just a thin strip of plastic that gets installed, sideways, between the
crank journal and the wear surface of the bearing shell. When the bearing cap is torqued down,
the plastic gets squashed. The bearing cap is then removed again, and the width of what remains
of the plastic strip is used to judge the clearance. Here is the #2 crank journal, with residue
from the plastigage still visible:

And here is the #2 bearing cap with the bearing shell still showing the plastigage:

Even though the wear was still within spec, there was visible scoring that went well down
into the copper layer of the bearing.
The #1 main bearing cap is tricky, because the heads of the bolts are so close to the plate that
covers the front main seal. The space is so tight that a socket will not fit around the bolt head.
An open-end wrench can be used (barely), but that is not recommended (you run the risk of rounding
off the bolt heads). The #5 bearing cap is even worse to get to - not only is it very close against
the plate for the rear main seal, but it's also right up against the toothed wheel that triggers
the crankshaft position sensor. The only way to remove #5 without splitting the engine and transmission
and removing the clutch and rear main seal plate is to use a socket with very thin walls. A thin
walled socket is also really the only good option for the #1 cap. My dad has a real knack for hacking
together special tools and modifying tools for special purposes, so he butchered one of my 1/2" drive
17mm sockets on the bench grinder, and we ended up with a magnificent thin-walled socket:


That couldn't have worked any better for those stubborn #1 and #5 bearing caps. We plastigaged the
#1 bearing and found it to be a little more worn than #2, although still within spec. That scoring
on #2 worried me, so I decided it was worth the little extra effort to change the main bearings
while we had everything apart. #4 was also scored (even worse than #2), and #5 turned out to be
the most worn (surprising, as it's closest to the oil pump). We didn't bother plastigaging #5, since
I had already made up my mind I was replacing all of them. Here is the very strange thing I found, though.
The ABA main bearings are each made up of 2 bearing shell "halves". The upper halves all have oil
passageways in them, and all of the lower shells are solid... except for #3. #3 has the
grooved shells both top and bottom. This is clearly stated in the Bentley manual. The lower shell
of the #3 bearing that I removed from this engine was not grooved - it was solid. I have
no idea why.
The trickiest part was removing and reinstalling the upper shells (between the crank journals and
engine block), but we managed. By the time the sun started to set, I was done installing the main
bearing caps, oil pump, and oil pan. After re-tensioning the timing belt and adjusting the power
steering belt tension (it was getting kind of sloppy), we were ready to fire it up. We started it
and let it run for a few seconds, and the oil pressure light was on constantly, regardless of
engine rpm. We figured it was just the oil pump being dry, and since we had used plenty of assembly
lube when installing the new bearings, we gave it another 30 seconds or so of running to try and
build some pressure. No luck. You know the kind of tricks your mind plays when things like this
don't go like you expect - you start to backtrace and think of anything that you could have done wrong.
What a lousy feeling. Everything had gone very well up until this point. Finally, we removed the
ignition distributor and rigged up a device to drive the oil pump using an electric drill. After
lots and lots of spinning, we seemed to have resistance in the pump again (it felt like it was drawing
oil). So we reinstalled the distributor and gave it another try... and success! We had oil pressure
and the motor sounded great - no more ugly rapping noises. The Golf has made quite a few small trips
since then, and it just runs great. I'm happy.
|
|
|
|
Sun Jan 08, 2006
10:32
|
|
|
A few days before Claire and I went down south to visit relatives
we had a very cold morning. It was right around 0 degrees
Fahrenheit. Our 96 Golf had always seemed to be harder to start
in very cold weather, and this particular morning it just would
not start after several attempts. When we finally did get it
started, it ran funny and the check engine light was on. At that
point, I didn't have time to look into it before we left for our
trip, so I left it until we got back. When we got back and I
hooked the car up to my laptop running
vagcom, this is what I found for a code stored in the ECU:
VAG-COM Version: Release 512.1-UD
Control Module Part Number: 037 906 259
Component and/or Version: MOTRONIC M5.9 HS V08
Software Coding: 00000
Work Shop Code: WSC 09446
1 Fault Found:
17988 - Throttle Actuator (Bank 1): Malfunction
P1580 - 35-10 - - - Intermittent
Seeing this made a lot of sense to me, because I have heard that
the electronic throttle actuators used in OBD-II Volkswagens are
prone to sticking and jamming during colder weather. I cleared
the code and it hasn't returned yet, although I expect that it
would be a problem again once the temperature drops. I hope that
some cleaning and silicone or white lithium grease will do the
trick to keep this from becoming a problem again.
|
|
|
|
Thu Jan 05, 2006
20:16
|
|
|
I know it's been a while since my last post, but that doesn't mean nothing's been happening!
I've got plenty of stuff to share, but this post is just for my most recent car-related
activity. I've known my A2 Golf needed a new head gasket for some time now, so I finally
got around to doing it. This past weekend was a good time for it, since I had Friday and Monday
off from work. Saturday I started to come down with some kind of bug - I felt pretty run down
and had a sore throat. I made it a lot worse by spending all day Sunday and all day Monday
out in the freezing cold New England winter tearing my car apart and putting it back together.
So what are the symptoms of a headgasket leak? Well, it can vary quite a bit. The main
components of an engine are the engine block and one or more cylinder heads. An in-line
engine will have one cylinder head, while most boxer and "V" engines have 2 cylinder heads. One
exception to that is Volkswagen's narrow angle V6 (VR6, as they call it) which has only one
cylinder head. The engine has passageways for circulating oil and coolant, and these passageways
run through both the cylinder head(s) and the block. The head gasket goes in between the block
and the cylinder head, and provides a seal to keep these oil and coolant passageways from leaking
into each other and into the combustion chambers. The gasket also keeps coolant and oil from
leaking outside of the engine. So depending on where the headgasket is leaking,
the symptoms could be oil and coolant mixing with each other (there will be oil blobs floating
in the coolant reservoir, and coolant sitting in the bottom of the oil pan), or coolant leaking
into the combustion chamber(s) and getting burned, or oil leaking into the combustion chamber(s)
and getting burned, or coolant and/or oil leaking to the outside, and running down the engine
block. In some cases, a headgasket failure can cause compression from one cylinder to leak
into a neighboring cylinder, which can really screw up the way the engine runs.

Here is the subject: 1991 Golf, 1800cc 8 valve, Digifant II.

Here's the dirty, old engine bay.

The easiest way to drain the coolant on this car is to disconnect the lower hose going to the
water pump. If you don't drain the coolant, you'll get a huge mess when removing the
cylinder head. I didn't drain the oil, because the level doesn't come up past the top of the
block.

Here the valve cover has been removed, and you can see the splash guard that sits directly
over the camshaft. That white stuff on the splash guard is a sign that there is a *lot*
of moisture getting mixed with the oil. This could indicate a bad head gasket.

Yikes! This is the under-side of the valve cover. Lots more of that white goop. It is
normal for some of this stuff to develop, especially if the car gets driven mostly for short
distances or if regular oil changes aren't performed. This much of it, however, is not
normal.

The "goop" has the consistency of warm peanut butter, and even though it looks nearly white
in these pictures it's actually a light brown (not quite as dark as peanut butter, but
close).

Here is a shot of the engine block all by itself in the car - the cylinder head has
been removed. This car has a Brospeed header installed, which turned out to make things
a little difficult. One of the pipes in the header just barely blocked one of the intake
manifold bolts from coming all the way out. Unfortunate, because the best way to get access
to the exhaust manifold/header nuts is to remove the intake manifold. In the end, I elected
to disconnect the header from the catalytic converter, and remove the cylinder head with
the header and the intake manifold still attached. It was very heavy that way, but it
worked out well.

Here's the grimy, old head gasket. Some of the coolant passageways were completely blocked
with crud.

This is the cylinder head, removed from the engine bay with the header and intake manifold
still attached. Lots of carbon buildup in those combustion chambers.

Here is the underside of the cylinder head again, after I spent a few minutes cleaning up
and blocking the surface that mates against the gasket. I used a good, heavy straight-edge
with some fine sand paper and diesel fuel to wet sand the surface (using the straight-edge
as a block for the sand paper).

Here is the gasket surface of the block after getting the same treatment. I also spent
some time cleaning some of the nasty carbon build-up from the tops of the pistons.

Hooray! The cylinder head is now back in place and bolted down. Some head bolts are
made to stretch when they are torqued down, so they cannot be re-used. Others are
not made to stretch, and can be safely re-used as long as they are not damaged.

Here's everything else installed - looks nearly the same as when we started! After refilling
the coolant system, I tried to start the car... and no luck. It just kept cranking. By this
time it was really late Monday night, and I was really feeling under the weather and I was
sick of being out in the cold. So I gave up for the night. I finally got a chance to look
at it again tonight, and it just turned out to be the valvetrain timing. Once that was corrected,
she fired right up.
|
|
|
|
Wed Nov 30, 2005
19:42
|
|
|
Our new Golf has been on the road for close to a month now,
and all is well. One thing I have noticed about the OBD-II
A3 Volkswagens is how slowly the engine RPMs drop between
gear changes. The OBD-I VWs have a small hydraulic device
on the throttle body that causes the throttle valve to
close slowly, achieving nearly the same effect. I believe
this is done to make the cars easier to drive. It allows
the driver to make easy, relaxed shifts without jerkiness
during clutch engagement. If the RPMs drop quickly, then
you must either shift quickly or quickly raise the engine
RPMs again as you re-engage the clutch in order to avoid
an ugly mismatch that can cause the car to buck or jerk.
Anyway, the reason I mention it is because the OBD-I cars
can be made to behave more naturally by removing that
small hydraulic device. The OBD-II A3s, however, appear
to behave this way due to the program in the ECU, and so
only an ECU update will get rid of this annoying trait.
All in all, she's a great little car that we are very
happy with.
|
|
|
|
Thu Nov 03, 2005
19:54
|
|
|
The black Golf had a state inspection appointment for Tuesday
of this week (that was November 1), so my plan was to drop it
off at the garage (Car Works) after dark on Monday. That would
lessen the chance of being pulled over for driving an uninspected
vehicle. My dad offered to follow me to the garage and give
me a ride back. Anyway, we went to start the Golf Monday
evening, and the battery was weak enough so that the starter
wouldn't crank. Kind of a pain, but no big deal - we jump-started
the car and drove down Route 125 to Car Works. When we got there,
I opened the door to get out of the car, and the alarm started
going off! The factory VW alarm simply blares the horn over and
over - the sound slices right through you. The normal way to
turn off the alarm is to insert the key into a door lock, and
turn it. I was frantically unlocking and locking doors to
shut the thing up, to no avail. The alarm simply would not
deactivate. By this time everyone at the shop was wondering
what the heck was going on outside. I had to run inside
and borrow a wrench so that I could disconnect the battery.
We spent a good 30 minutes there in the parking lot trying to
figure out what the heck was going on - the alarm goes off when
the battery is disconnected then reconnected (that's normal
behavior for VW alarms), but we had no way to turn it off.
I will spare you the
painfully long version of the story, but we finally managed
to get me into the driver's seat of the car, with the alarm
deactivated, so that I could drive it back to the house (the
car won't start if the alarm is active). After hours of
investigation without getting much of anywhere, we started to get
desparate and were checking everything that was even remotely
related to the alarm and central locking systems (not only
was the alarm acting up, but the central lock function seemed to
stop working as well). This car has the vacuum pump for the
central locking system located in the same housing as the
central lock control module. We tested the vacuum pump to
see if it was working, and it was dead as a doornail. Just
for the heck of it, and because the central locking system
is sort of related to the alarm system, we decided to see
what would happen with the central lock control module and
pump disconnected. Sure enough, the alarm behaved normally
again. Going back to the central lock module, my dad pried
the cover off the box, and some water poured out. The module
itself is just a small circuit board, and it was extremely
corroded and stank of burnt electronics. We got the car back
to the garage around 11:00pm.
I got a call on Tuesday from Car Works, saying that they
didn't like the amount of play in the front strut mounts.
I had replaced the bearings in the mounts, but not the rubber
bushing that takes up the space between the bearing and
the body of the car. So I took the car back that night,
spent a couple of hours replacing those bushings, and
the next morning I made arrangments to drop the car off
again. It is now back at the shop, waiting for a sticker.
|
|
|
|
Sat Oct 22, 2005
20:00
|
|
|
At long last, our "new" Golf is ready for state inspection. Today I replaced one of the
turn signal bulbs, a front corner marker bulb, both rear license plate bulbs, and one
tail light bulb. The brakes are all taken care of now, too. The parking brake cables
needed a lot of adjustment - that's kind of a pain because the rear section of the center
console has to be removed in order to get to the cable adjusters behind the base of
the parking brake lever. I had thought that the brakes would need to be bled, but
once the parking brake was adjusted, the brake pedal felt nice and firm.
So, that's it. That's all she should need to pass inspection. Since purchasing the car,
I have done the following work to it: New Neuspeed stainless steel cat-back exhaust system,
new master cylinder, new braided stainless steel brake lines, new front strut inserts,
new upper strut mounts, new rear wheel cylinders, new upstream oxygen sensor, new mass
airflow sensor, realigned front doors, adjusted parking brake, replaced a bunch of
exterior light bulbs. Looking back on it, that's quite a bit! Including the $1000 that
I paid for the car itself, I think I have just over $2000 into it - and that's including
the stainless exhaust sytem, which was almost $600 by itself. I could have gone for a
plain aluminized exhaust system for around $200, but I really wanted a high quality
stainless system. In this part of the country aluminized exhausts just dont' last
very long, and I don't enjoy doing exhaust work. At any rate, she is one *sweet* Golf
for just a couple grand.
I now need to make an appointment at Car Works (our local VW/Volvo specialists) for an
inspection, and an alignment (because I had the front suspension apart). I think it
should pass, but you never know.
|
|
|
|
Wed Oct 19, 2005
18:42
|
|
|
I meant to post this yesterday, but didn't get a chance. The
front doors on the black Golf are now aligned so that they open
and shut correctly without rubbing against neighboring body parts.
It really was kind of a pain, but well worth the effort. The doors
had to be completely removed in order to access the torx bolts
that hold the hinges to the body. The hinges have elongated
holes, which allows for adjustment.
|
|
|
|
Sun Oct 16, 2005
13:30
|
|
|
This morning I replaced the MAF (mass airflow sensor, or "air mass sensor" as VW calls it) in the
black Golf. I replaced it with a remanufactured sensor that I purchased from
Impex. I don't know what
"remanufactured" means with these things, but it looks brand new to me. You can get the reman sensor
for roughly $70, versues nearly $300 for the new.
Once the sensor was replaced, it was once again time to run through the tedious procedures for setting
the readiness codes, using the vag-com
software. There are portions that require the car to be driven under certain conditions while at the
same time examining the feedback from the vag-com application. It would be very difficult and incredibly
dangerous to attempt that on your own; fortunately, my dad was around to ride shotgun and keep an eye
on the laptop while I drove. I am always worried that stuff won't work, so imagine my delight when
when we finished all 20 procedures and saw the following screen, telling us that the readiness codes
are now set:

|
|
|
|
Sun Sep 25, 2005
18:24
|
|
|
Here are pics of the block, with all 4 pistons/conrods installed:


Here is one of the reasons that the OBD-I ABA block is such a
popular upgrade - they have 4 of these piston oil squirters
(normally only found in high end turbo applications) from the factory:

Here are some shots of the valve spring compressor that my dad
and I made:


It works well. In the pictures above, you see it bolted to the
cylinder head that I will be using on top of the ABA block. There
are no valve springs or valves in the cylinder head in the pictures -
these are just to show the way it works. That little window cut
into the "foot" of the spring compressor allows access to the
valve keepers once the springs are compressed.
Here is a box full of the valves, valve springs, keepers, and
retainers that will be going into the cylinder head. They
are all stock.

|
|
|
|
Sat Sep 24, 2005
19:29
|
|
|
A quick update for tonight - all 4 pistons/connecting rods are now
installed. After mis-reading the markings on the connecting rods and the
rod bearing caps, I had all 4 caps installed wrong. Once that was
corrected, everything turned over nicely.
I found the camera, so tomorrow you can see pics of the home-made
valve spring compressor that I will be using for the cylinder head
that will be going on top of the ABA block. It should work well, I think.
|
|
|
|
Thu Sep 22, 2005
17:20
|
|
|
I can't find my camera, so I don't have any pictures to post with this, but
3 of the 4 ABA pistons are now installed. "Why only 3?", you ask? Well,
there was an incident several days ago. I accidentally broke a couple
of rings while attempting to install the first piston. My first attempt was
using a rolled piece of sheetmetal and a couple of hose clamps to compress
the rings. That arrangement was awkward to work with - nearly impossible
to get the bottom edge of the sheetmetal to sit perfectly flush against
the top of the cylinder block. That meant that there was a little bit
of a gap between the ring compressor and the block that allowed the rings
to expand just enough to get all mangled as I drove the piston into the
block.
The day after breaking the rings, I ordered replacements. Just last night
I found that my dad had borrowed a real ring compressor from a friend of
his. So we tried it out and had great luck getting 3 of the pistons
installed. The new rings arrived today, so now I can get the fourth one
out of the way. Pics when I remember where my camera is.
|
|
|
|
Wed Sep 07, 2005
18:15
|
|
|
Yesterday I called Atlantic and had them order a set
of correct piston rings for my ABA build. They arrived today, so I went and picked them up.
These are Goetze instead of Mahle. Both are superb quality, but at least the instruction
sheet with the Goetze rings has better grammar.


I was planning on getting the crankshaft and pistons/rods installed tonight, so I started by
opening my package of new main bearings:

That little white packet contains the 4 thrust bearings that get installed on either side of
the #3 main crankshaft journal.
I had all of the main bearing caps bagged and tagged, so I just cleaned them up, popped all
of the new main bearing shells into place in the block and in the caps, applied plenty of
assembly lube, carefully placed the crankshaft into place, and worked the caps into
place on top of their respective main journals. According to the Bentley manual, there are
2 types of main bolts used. The early type are shouldered and get torqued to 48 ft*lb. The
later type are threaded all the way up to the head, and get torqued to 48 ft*lb plus another
quarter of a turn (90 degrees). I had the later type. The crankshaft is the original from
this engine block (220,000 miles!), and I had it worked over by a reputable machine shop in
our area (R&L engines). They didn't have to grind the journals for oversized bearings because
they were still well within spec. It was a simple radius and polish job. I got the crankshaft
back well packaged, oiled, and looking brand new. It only cost $65. Here is that beauty
of a crank installed:

I didn't get any of the pistons installed because I don't have a ring compressor. Well,
that's not entirely true. I just don't have one that will fit 82.5mm pistons. So my next
ABA rebuild related post will be me making a ring compressor and (hopefully) installing
the pistons and attaching the connecting rods to the crankshaft.
|
|
|
|
Mon Sep 05, 2005
18:15
|
|
|
Today's "down": That nice set of Mahle piston rings that I bought quite
a few months ago to use in my ABA rebuild turns out to be for 1.8 liter VW engines with an 81.0mm bore. If you know the ABA motor, then you
know it's a 2.0 liter with an 82.5mm bore. Had I bothered to look at the label on the bottom of the box after
receiving them, then I would have known right away:

Gah!!! I'm a moron.
That was a real downer after I got myself all excited for reassembly and even put together one piston/rod assembly:

 Today's "up"
: I got a chance to try Ross-Tech's little diagnostic
procedure to do a sort of crude check of the mass airflow sensor in the black Golf. I think their fuel-trim writeup
was geared toward something other than the ABA cars because the measurement block they said to read for the mass
airflow sensor feedback was 002. I ended up finding it in 003 instead. So I did what they said - while monitoring
the sensor feedback in group 003, I did a run up to redline in 2nd gear. The reading peaked at about 103g/s which
is definitely a little high. The calculation is pretty simple: take the peak reading and divide it by 0.8. The
result should be the approximate horsepower output of the engine. In my case, it's a stock ABA which is supposed
to be 115 horsepower. My peak reading of 103 divided by 0.8 gives 128.75. To reinforce this, I found that there
was a DTC stored in the car's computer:
16487 - Mass Air Flow Sensor (G70): Signal too high
P0103 - 35 - 10 --- intermittent
So that gives me something solid to go on, at least.
|
|
|
|
Sat Aug 13, 2005
21:52
|
|
|
It's been a while since my last post. You may have noticed there is now
a link over to the left to get an RSS feed. I
doubt anybody will subscribe, but hey - it's there if you want it.
So, the new oxygen sensor
is now installed. Since the purpose of this blog is to document my mechanic-ing, here is a little writeup
outlining what was involved.
Here is the target of our operation, the old oxygen sensor. This is the upstream (or forward) oxygen
sensor so it lives, as you see here, threaded into the rear of the downpipe (just ahead of the catalytic
converter).

Here is a point-of-view that I'm all too familiar with.

Okay, step one is to unplug the electrical connector coming from the oxygen sensor. In this case,
the plugs for both oxygen sensors meet their mating plugs in the back of the engine bay, toward the side
where the airbox is mounted. The engine mount in that rear corner has a small bracket mounted to it
that the oxygen sensor plugs snap into, to keep them from floating around inside the engine compartment.
These two pictures are looking down past the air intake at the plug for the upstream oxygen sensor, disconnected
from it's mating plug. You can't see it, but just behind my hand in the second picture there is a brown
plug, which is the connector for the rear (downstream) oxygen sensor.


With the electrical connector unplugged, and the clips/zip-ties removed from from the wire, the sensor
itself can now be removed from the downpipe. In the first picture below, you can see a special oxygen
sensor socket slid over the sensor. Unless you're willing to cut the wire off the sensor, you need more
than just a really deep socket - you need one of these, which has a channel cut into it that lets the wire
get out of the way. Of course, you can also use an open-ended wrench if you happen to have one the right
size. It can sometimes be a real struggle to remove an old oxygen sensor. I usually have good luck
letting the car run for several minutes, and then squirting some penetrating oil (like PB Blaster or Aero Kroil)
around the mating surfaces. In this particular case, it worked quite well - very little effort was required
to remove the old sensor.


Here is the new sensor (Bosch, of course) - I recommend OEM for these things because I've heard too many
stories of people using aftermarket sensors that don't respond as quickly. For older cars, it's probably
no big deal, but for anything 1996 (OBD-II) or newer, that could be a problem. This Bosch sensor even
came with anti-seize compound on the threads - how nice is that!

Here is the new sensor being installed.

With the new sensor installed, I fired up the vag-com software on the laptop again to take a look at things.
As expected, it showed that the upstream oxygen sensor was now perfectly within spec all of the time. Unfortunately,
I continued to get "multi-trim fuel bank too rich" DTCs when trying to set the readiness codes. Below is a
picture of the Go Mango laptop running the vag-com software. Notice the USB-to-OBD adapter running from the
laptop to the diagnostic port in the dashboard of the Golf.

I've been doing some research about this multi-trim message, and somewhere in the VW Vortex
I found this really handy posting on the ross-tech website:
http://www.ross-tech.com/vag-com/cars/fuel-trim.html.
It looks like I need to take a closer look at my Mass Airflow Sensor. I'm not getting any codes that indicate a
MAF problem, but it's worth checking at this point.
|
|
|
|
Wed Aug 03, 2005
23:29
|
|
|
Shift linkage is
now taken care of. I removed the bolts holding the bracket to the steering rack, chased the
threads with a tap, and reinstalled the bolts using some red loctite.
In other news, the new oxygen sensor
for the black Golf arrived today. Sweet.
|
|
|
|
Sun Jul 31, 2005
11:44
|
|
|
I found an OE upstream oxygen sensor for the 96 Golf at Autohaus
Arizona for $72.92 so I went ahead and ordered it. 2 day UPS delivery was only $9.31 extra -
so even with fast shipping it was cheaper than the next best price I found. Sweet.
|
|
|
|
Fri Jul 29, 2005
22:32
|
|
|
So, last night I took a stab at setting the readiness codes on
our A3 Golf. After
replacing the cracked ignition coil, I wanted to give it a try to see if that was
the cause of my DTC indicating a rich-running condition. I am still getting that
same DTC part-way through the readiness procedure, so now I am leaning toward
the upstream oxygen sensor as the culprit. The duty cycle for the upstream sensor
is intermittently out of spec, I have noticed.
I meant to post this last night, but I just didn't have the time.
|
|
|
|
Mon Jul 25, 2005
21:31
|
|
|
This evening my dad stopped by with a spare ignition coil to try on the
A3 Golf. Once the old coil was removed, it didn't take
much looking to see that it was badly cracked. It still had some throttle
hesitation after swapping the coil, but in the course of fiddling with
things, we ended up removing the connector from the throttle position
sensor and then reconnecting it... and then it ran just fine. I think
the connector may not have been fully seated.
So now I'm really eager to hook the laptop back up and see if I can get
those readiness codes all set. More news tomorrow, I'm sure.
|
|
|
|
Sun Jul 24, 2005
22:56
|
|
|
The pistons are nice and clean now, I gave them a final Castrol
Super-Clean bath today and they're now ready for reassembly. This
coming week I should have an update (and pics) of the putting-stuff-back-together
phase.
|
|
|
|
Sat Jul 23, 2005
23:12
|
|
|
Sat Jul 23, 2005
21:24
|
|
|
Today I had a spare half hour or so to do a little more cleaning
on my ABA pistons, they're starting to look nice:


And here are some pics of the block I
mentioned earlier:


|
|
|
|
Sat Jul 23, 2005
11:41
|
|
|
This is another background post, regarding our "new" 1996 Golf. This black beauty came from LaPlata, MD
(just a few miles from the Maryland/Virginia border), the previous owner was getting rid of it for a song
because it had issues he didn't want to deal with. Those issues were, primarily, brake fluid leak, wheel bearing
noise, and of course the "check engine" light was on. My father and I have done crazier things than drive
to southern Maryland, buy a car, and tow it back all in the same day... I just can't remember any offhand.
We rolled into LaPlata a little before 6:00am after driving all night, and by 9-ish we were back on the
road with the Golf in tow. Before too long, we had an incident with a truck driver honking crazily at us
and trying to catch our attention with excited gestures. So we pulled onto the side of the highway and
inspected things - turned out the rear drivers' side wheel bearing was loose. We limped to the next exit, found an
empty parking lot, removed the wheel, and tightened the bearing a whole bunch. That would be the source
of the bearing noise the previous owner was complaining about. I think when that bearing was installed one
(or both) of the outer races didn't get pressed completely into place, and as the car was driven they
slowly seated themselves, leading to excessive play. At any rate, we completed the rest of the journey without
incident.
I'll post pics of the car later, but she's definitely a looker - especially for a 4 door. No rust (gotta love
those southern cars), good original paint, and fewer-than-usual dings.
The problem with the brakes, which the previous owner had supposed was a bad master cylinder, turned out to be an external fluid leak
at the passenger side rear wheel cylinder. It was leaking so badly that brake fluid peed out everywhere
when I removed the drum. The cylinder on the driver side was beginning to leak as well. I replaced both
rear wheel cylinders, as well as the master cylinder (I had already ordered it, and the old one will come
in handy the next time I need to do a big brake conversion on a Rabbit) and both of the flexible, rubber
brakelines up front that attach to the calipers. I replaced them with braided stainless steel lines to tighten
up the brake pedal feel that little extra bit. I bled the brakes using an el-cheapo one man brake bleeder
that seemed to work okay, but there's still a little air in the lines so I'm going to pressure bleed them.
The next issue to tackle was the check engine light. My dad and I use the
Ross-Tech vag-com software to interface
with our Volkswagen ECUs, so I fired up the little orange laptop and took a look at which DTCs (Diagnostic
Trouble Codes) were active. Of course, being an A3 Volkswagen, it was: G40 (Camshaft Position Sensor, Implausible Signal).
In english, that means "someone didn't know how to do the timing on this vehicle". After a couple of attempts
at setting the valvetrain-to-crankshaft-to-intermediate timing, I got it right on the money and the ECU
was happy again (no more check engine light).
After clearing the DTCs (necessary to shut the check engine light off in this case), the "Readiness Codes"
also get reset. I could write a whole book on readiness codes, but they're basically a bunch of
TRUE/FALSE conditions that all OBD-II (1996 and newer) vehicles store in their ECU. They are all directly
related to emissions equipment on the vehicle (evaporative emissions system, catalytic converter, oxygen
sensors, etc) and all of them must be TRUE (or READY) in order for the vehicle to pass New Hampshire
state inspection. So at this point, all of my readiness codes were FALSE (NOT READY). There are a series of
procedures that can be performed to enable the readiness codes one-by-one (these procedures vary depending
on the vehicle), or it can be done by simply driving the car under all possible driving conditions for several days.
So what I found while trying to enable these codes on our new Golf is that a few of them were failing. After
a lot of hassle and troubleshooting, I found that the ECU is reporting a rich condition under some of the
"driving conditions" and that is keeping some of the readiness codes from being set. I suspect a spark issue based
on the car not starting a couple of times after it had rained, and poor throttle response under most
conditions (I think all of my cars have had ignition issues at one time or another).
Along the way, I also replaced the front struts and strut mounts, as well as the exhaust. For the exhaust
I went with a cat-back system from Neuspeed... yes, the stainless one. You've probably seen it - it looks
pretty hot on an A3 Golf, with those dual up-swept outlets. I opted for the version with two mufflers and
one resonator, just like the stock system. I didn't want this to be a loud car, but I didn't want it to
sound stock either. The sound, I must say, is impeccable. Very subdued, but deep and a little bit throaty at
the same time. It's the polar opposite of my obnoxious sounding little A2. On a related note, I was very
impressed with the quality of the Neuspeed system. The welds were top quality, and the over-axle pipe mated
to the front pipe using a flange rather than the usual slip-over connection. The clamp for joining the
front pipe to the catalytic converter was also top quality. The fit was superb, and it was a breeze to install.
So, all in all I'm feeling great about this little car. I'm really excited to get it through inspection and have
Claire (my wonderful wife) start driving it on a daily basis.
|
|
|
|
Wed Jul 20, 2005
23:21
|
|
|
This is a project that has been in progress for a while now, so this post
is just to provide background info and get up-to-date on
where I am with it now.
Purpose: Perform one of the most basic watercooled VW engine swaps: An OBD-I ABA
2.0 liter block swap. The ABA block is fantastic because it bolts up with the
cylinder heads used on the earlier cars. It also mates with the 020
transmissions and uses the same engine mounting points. In my case, I have an A2
Golf with the factory 1.8 8valve and Digifant engine management. Here is the why:
-My current motor is whipped (poor headgasket, valve stem seals, main bearings).
-200cc increase in displacement (more torque, potential for more power)
-The OBD-I ABA has high quality, forged internals.
-This will allow me to easily use a serpentine belt to drive the alternator rather than a v-belt.
-It's nearly as easy as replacing the stock engine block, so why not do it?
There are a few minor differences between the ABA block and the earlier blocks that
I will need to contend with. First of all, the physical height of the ABA block is
about a quarter of an inch greater. Secondly, the ignition distributor normally used
with the ABA block is different than the distributors used with the earlier blocks (it's hall
sender uses a different number of pulses per revolution and the mounting base is physically
larger). Last of all, there are openings in the ABA block, which are normally used
for crankcase ventilation, that must be blocked off for my purposes.
I will be rebuilding a spare Digifant cylinder head as well as an ABA block that I received
for free from my brother, so that I will be able to swap the whole assembly once the rebuild
is complete.
I have all of the parts necessary for a complete head and block rebuild, the ABA block
has been completely disassembled and pressure-washed and painted (using POR-15), the
cylinder bores have been honed, the crankshaft has been professionally resurfaced by
my favorite local machine shop, and I am nearly done cleaning the pistons. Once the
pistons are cleaned, I can start assembling the block.
|
|
|
|
|
|
A1 parts for sale:
|
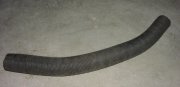 Item:
Item: Intake air pre-heat hose (from exhaust manifold shroud to air box), for Scirocco 2 (1982+)
Condition: New
$12
|
|
|
|
A2 parts for sale:
|
 Item:
Item: GTI dual-round grille with inner lights, bulbs, and lower trim strip
Condition: Used, lower trim strip is weathered.
$35
 Item:
Item: Parcel shelf strap, 3 available
Condition: New
$3.50 ea.
 Item:
Item: 8 (eight) valve guides, German, standard size, for 8 valve head
Condition: New
$24
 Item:
Item: Wheel cylinder (for rear drums, obviously), 2 available.
Condition: New
$12 ea.
|
|
|
|
A3 parts for sale:
|
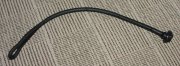 Item:
Item: Parcel shelf strap, 3 available
Condition: New
$3.50 ea.
|
|
|
|
A4 parts for sale:
|
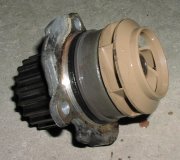 Item:
Item: OEM Water pump, ALH engines
Condition: Used, 130,000 miles
$20
|
|
|
|